How Diamond Like Carbon Coatings Are Formed

diamond-like-carbon-coatings

DLC coatings are dense, consistent, and relatively simple to create.

Written by: Denton Vacuum, LLC

Diamond like carbon coatings, or DLC coatings, can be deposited using a variety of deposition methods such as sputtering, cathodic arc, ion beam, electron beam, and lasers. Through the process of physical vapor deposition, one can create a high quality and consistent DLC coating that can be used for a variety of applications.

Coating Process Sample

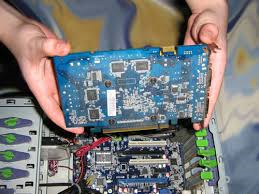
One of the most common ways to produce DLC coatings is through a sputter coater, which is essentially a vacuum chamber that has the ability to deposit metals onto a substrate through a complex process. The product can be placed within the chamber on a fixturing carousel when it is evacuated. The produce will then be preheated to a low processing temperature that will not exceed a certain temperature – typically 300 degrees Fahrenheit. The preheating phase will then condition the substrate for the coating to ensure that all of the moisture that has been absorbed by the material has been outgassed before the deposition process occurs.

The process will then transition into the ion etching phase where the product will be bombarded with ions and electrons. There will then be a scrubbing phase, which cleans the surface and remove any micro oxides. The process will then move on to the coating phase, which involves thin film evaporation to occur to begin the production of the DLC coating. When the underlayer coating reaches the proper thickness, the process will then transition into the DLC coating step, which deposits a dense and smooth amorphous carbon layer onto the product surface.

How to Install a Graphics Card

Installing a new graphics card can really give your PC a boost when it comes to playing even the most visually demanding games that you might want to play.

However, finding the right graphics card (mostly from companies such as Nvidia or AMD) is very important considering how many there are. The budgets also range from below $100 to above $1000.

mysystemjournalWhile it will be ideal to find the right graphics card that gives you most bang for your buck, it’s also important to consider a card’s heat, noise and power consumption. Of course, it’s important to check whether your PC has the right hardware to support your new card.

The most common problem that you might have is with the right power supply especially if it is multi-card configuration. Finally, the last thing that you must think about is whether there is enough space in your PC for the graphics card of your choice.

Now, installing a new graphics card is pretty simple. All you need is your PC, graphics card and a Phillips-head screwdriver. Make sure you turn off your PC and unplug it before you start the installation.

First, you have to remove the casing and then find the graphics card so as to remove it. If there’s isn’t one, then it’s time to locate the PCI-E x16 slot which is closest to the heat sink of the processor and which will either be the first or second expansion slot on your motherboard.

If you’re replacing an existing graphics card, remove any cables, loose wires as well as the existing screws from its retention bracket and the old graphics card and replace it with the new one. Use screws to hold the graphic card’s retention bracket to the your computer’s casing.

Also, you might need to add additional connectors and which is where connecting PCI-E cables will not work without that extra power and your PC might not be able to boot.

How to Fix Hardware Issues That You Might Not Understand

No matter what happens to your system, it usually has little or nothing to do with the hardware but with the software that is powering it.

Even if you don’t know how to go about fixing the problem, there is a simple trick that one can use to fix most if not all simple hardware issues that you might face. In particular, if one of your PC components stop working, then you can try this too.

For starters, you have to open Device Manager in Windows 8.1 if that’s the operating system version you are using.

Now let’s say that your USB Port is the problem and for which you get an error code 43. Remember that this error type isn’t just for USB drives but for any software component on your system.

Once you have opened Device Manager, then look for Universal Serial Bus Controllers which when selected will throw up a list of USB drives on your PC. In this list, you will find an item with a yellow triangle titled “Unknown device”. Select it and another window will open.

If you see the message “Windows has stopped this device because it has reported problems” in a window titled ‘Device Status’ which is in the General tab.

Now, in order to resolve this particular issue, click the Driver tab and the Uninstall button. This will uninstall the low-level software that is used to run the hardware on your system. Next, go back to the main Device Driver window and select Action and Scan for Hardware Changes. Windows will reinstall the missing driver.

Finally, go back to the General tab and check the Device Status which should say that it is working properly now.

What You Need to Know About Partitioning Your Hard Drive

Most PCs, with Windows installed, already have two or three partitions. Usually, your drive has one main partition (C:) which amounts to most of the physical space available on the hard drive. The others are used for recovery and maintenance purposes.

Simply put, while the physical disk is a single entity, creating one or more partitions can slice it into a number of drive with different letters (D, E,F) and which can make daily computing all that more easier. If you must know, the operating system treats each of these partitions as separate drives.

But why would you want to create partitions? Anyone who has will know how much of a hassle it can be.

As mentioned earlier, one good reason to have partitions is if you want to run two operating systems namely Linux and Windows. Another would be to separate system and data if only for backup purposes.

In other words, you can leave Windows among other programs on C: while all your music, documents, videos and pictures can go on D: drive. It goes without saying that the latter will have more space allocated to it.

Of course, you can backup your Windows environment by creating an image of your C: drive but this file will be large if you don’t partition the physical drive. And this is why separating your libraries and programs is a good idea since using a backup program will not be tedious.

Yet before you think about partitioning, make sure you get expert help or you can risk losing data as a result.

What You Need to Know (and do!) Before Purchasing RAM

The reason why your machine is slowing down might or might not have to do with your Random Access Memory.

However, the more RAM you add, the faster your system will get apart from the fact that it it easier to install compared to installing a solid state drive. This is for the reason that with the latter, you will have to move the operating system.

Yet the question remains that you not only have to know what type of RAM your system will accept but also how much of it too.

Now, if you want to make sure that you actually need more RAM, select Task Manager and the Performance tab. At the bottom left-hand corner, you’ll see the amount of RAM that is available and if it is less than 25 percent, then it’s time for an upgrade.

Another aspect that you must consider is to determine the most effective arrangement for your RAM in terms of using the available memory slots. In most cases, they are arranged in pair whether two or four.

In order to understand this, check your motherboard’s manual. One thing that you should keep in mind for better performance: add RAM to different slots that use different memory channels.

Ultimately, if you are not sure about what you need or what you’ve got, then use the Crucial System Scanner. Download the program and run it: the results should tell you how many slots are filled (and with what!) and how many are empty. It will also tell you what kind of RAM to purchase as well.

How to Find (and Replace) Faulty RAM

It goes without saying that a defective RAM can cause lots of problems. Some of these include Blue Screens of Death, reboots, freezes and frequent crashes too.

In fact, if you are using a memory-intensive game or application and these issues occur, bad RAM will most likely be the cause for this to take place. However, it would be a bad idea to assume this and try and fix the problem according to this assumption.

However, if you are sure that a bad RAM is truly the problem, then you will have to identify the bad module as the next step.

For this, one can use a free, diagnostic tool called MemTest86 which can loaded on both a CD as well as a USB drive. Both these versions are bootable, and once installed on either type of removable media, you can run the test.

Now before you do that, shut down your computer, unplug the power cable and open your laptop or PC. If you’re not sure how to do that, then look through your user manual for help.

Next, remove one RAM module. Now close your computer and run the memory test at least three times. It will take at least an hour to do so.

(You might have to go into Setup because of the change in RAM before you run the test, and while you’re there, check if it is showing the right amount too or else make the right changes.)

Repeat this process for all the modules too see which one is faulty and replace it with a new module.