The Best Cloud Storage Providers

Article written by My system journal

mysystemsjournal4There is less and less of an emphasis on local storage when purchasing computers or phones. This is mostly due to a lot of services moving online. Streaming video services like Netflix negate the need to store video or our hard drives. In the same vein, services like Spotify and Apple Music mean we don’t need to keep our massive music collections on any of our devices, even our phones. For all our other storage needs, there are several cloud storage providers to choose from:

Dropbox

This service was the most popular. Due to being written into almost every major iOS app, it grew from startup to a billion dollar company. Although its star has faded recently due in large part to growing competition, its integration with iOS apps means that it still is the way to go for iPhone and iPad users.

iCloud

One of the biggest complaints with iCloud was its lack of stability and space. While you still need to purchase additional space, Apple has fixed all other issues with the service. Its popularity is growing within apps and is probably the best choice if you are all-in on the Apple ecosystem.

Google Drive

After a late launch and a mixed start, Google Drive has finally evolved into a mature cloud storage product. For mixed environments Google Drive is the best storage provider available. Excellent integration into Android, iOS support along with Windows and Mac clients give it a multi platform edge.

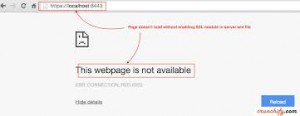
4 Ways to Deal With A HTTPS Error Message

There are times when using our PCs, an error message saying that theHTTPS secure Internet connection has failed.

You might wonder whether this message is serious. Hardly. It’s a common error message that we all get, actually.

Here are 4 ways to deal with this HTTPS error:

1: Reboot

Probably the first thing that you should do when you see an error message such as this one is to reboot the system. If that doesn’t fix it, then you should move on.

mysystemjournal3 2: Check the system time

Now, check the system time on your PC. If it is incorrect, then the date and time on the SSL certificate on the server will not match up with the time on your PC. To fix this, access the Date and time settings located at the bottom when you select the time in your taskbar. If Windows is setting the time automatically and it is still wrong, then turn that option off. Click Change time and date manually.

3: Are you not at home?

One suggestion that Google Support state is that if this is happening on public Wi-Fi, then you might have to log in again through the network’s splash page. In other words, visit a non-HTTPS site and check to see if you end up having to agree with the site’s terms and conditions prior to accessing the Internet.

4: Run a complete antivirus scan

Do not run a quick system scan but a long, complete one. This might be taking place because of malware or viruses too. If you have an antivirus program that checks your network connection security, such as Avast Free Antivirus, then run that as well.

3 Tools to Help With Email Productivity

Email usually makes the idea of a productive workday difficult. Yet it doesn’t have to be this way since Gmail has a number of built-in features apart from third-party tools that can change this.

Here are 3 tools that you should start using with your Gmail account as soon as possible:

 mysystemjournal11: Unroll.me

Signing up for subscription offers, newsletters and daily deals usually results in your inbox overflowing with spam. Using Unroll.me can change all of that in a hurry. When you connect your Gmail account to this service, it will scan for subscriptions and compile the senders into a list. Now, click the Unsubscribe button next to each sender to get rid of subscriptions you don’t want.

2: Rapportive

If you’re one to receive a lot of emails from a number of people, turning to Google to find out more information about them is the next step. This tool built by LinkedIn will help you to find that information without having to search for it. One excellent aspect of using this tool is that it replaces Gmail’s sidebar ads while offering you emails with detailed information about the sender of an email.

3: Todoist

What this tool helps you to is process your emails much faster by turning them into task list items. Integrating this popular to-do tool with Gmail will help you clear up your inbox as much as possible by prioritizing email as well as assigning deadlines and reminders too. Best part about using this app is that it syncs across all devices so you can clear out your inbox regardless of the device that you use.

3 Tips For Website Users To Defend Themselves From Hackers

Most cyber attacks are targeted at smaller websites that do not have the skills or time to protect themselves.

One clear example of this was a number of WordPress sites that were hacked just last year itself. If you don’t want to be one of these sites, then you have to conduct regular maintenance.

This is because cybercriminals are looking for a loophole. It could be anything from easy passwords, failure to add the latest patch or even sire misconfiguration.

Yet the problem does not lie with the content management systems but with the users themselves.

Here are 3 tips that can help users defend themselves from hackers:

 mystemsjournal4

1: Update Quickly

If you are managing a site, make sure that the core content management system updates are taken care of by the hosting service. Keeping up with information about these vulnerabilities is necessary but very tough to handle. In fact, it is considered almost impossible to do this. So, it’s a good idea to use web-security services such as Incapsula, Cloudflare and Sucuri to ward off attacks until you stay updated.

2: Remember Plugins and Themes

It’s not easy to keep the main content management system up-to-date. This is because patching every plugin can be cumbersome. Yet attackers are exploiting the vulnerabilities in plugins and themes.

Use plugins built for security purposes. Some of them are iThemes Security, Wordfence and BulletProof Security.

3: Regular site maintenance

If you have a hosted website, then it requires regular responsibility without fail. Administrators should remember to backup the site. Also, they should make sure that it is copied off the web server too.

If you don’t have time to do this, then go with a fully managed site as offered by WordPress. For Joomla and Drupal, a hosted service provider can do what needs to be done.

How to View Webpages When Offline in Chrome and Firefox

Almost everyone who uses the internet regularly experiences moments when their connection goes down. While this can be frustrating, you can still view these pages using Chrome or Firefox even if you are offline.

This is because both browsers have the ability to display content from their caches instead of the live version that you see on the site.

mysystemjournal4Please keep in mind that accessing these pages in this manner might change and which could render the saved webpage inaccurate. Of course, the browser cache only contains a limited number of webpages that you’ve browsed recently. This will not work on sites that have live feeds such as Netflix or Facebook.

Anyways, if you require information from a news site or from a webpage that you viewed recently, here are 2 solutions by which you can do this for each browser.

1: Chrome

Chrome is experimenting with how these webpages can be displayed. No, not the live ones but offline. That said, and for this to happen, you can start by typing “chrome://flags/#show-saved-copy” in the URL bar. After this, select Enable: Primary from the dropdown menu. You’ll find this from under the “Enable Show Saved Copy Button” heading. Once you’ve done this, then restart your browser.

Now, take your PC offline and try reading a webpage that you recently viewed. While you will see an error message from Chrome, you’ll also see a ‘Show saved copy’ button. When you click that button, you will see the version of the webpage when you were online.

2: Firefox

There’s no flag to set so as to view content offline in Firefox. Now, to view webpages from your cache, select the ‘hamburger’ icon in the upper right hand corner of Firefox. After this, select Developer>Work Offline. You’ll be able to find the webpage that you were looking for as long as it is in the browser’s cache.

How to Stop HTML5 Video Autoplay in Chrome and FireFox

Visiting a web page can be irritating given that there are videos that play automatically. Flash videos are one type while there’s another: HTML5.

No matter the type, they can both be just as annoying and should be blocked if you intend to not be interrupted. If you use either Chrome or Firefox or both, it’s easier than you think. That said, there still isn’t a fix for this when you use Internet Explorer.

Here’s how you stop autoplaying HTML5 videos:

mysystemjournal21: Chrome

First, you need to download and install a Chrome extension known as Stop YouTube HTML5 Autoplay. This is an extension developed by Port Zero. If you can’t download the file, then go to the developer’s site. It must be pointed out that even non-YouTube HTML5 videos will be blocked.

The program is excellent and works very well. Just install and enable it and the videos won’t start automatically. Of course, you can click the video to get it going.

2: Firefox

If you use Firefox, you don’t need an add-in or extension to enable this. First, open a Firefox tab or window. In the address field, type “about:config”. After this, click the “I’ll be careful, I promise” button. A long list of settings is thrown up. You’ll find a search field above it. Enter the word ‘autoplay’ and hit Enter. One entry is thrown up: media.autoplay.enabled.

Look for the Value column. Now double-click the entry. The Value will change to False. After this, the next time you visit a web page with videos, an image will come in place of the video itself. It won’t start until you want it to either.

How to Mute Noisy Chrome Tabs With Just One Click

When you have a number of tabs open and a number of them are playing audio or video, it would be hard to tell which one is playing what.

Which brings us to the volume indicator which was old news in 2014. However, in 2015, Google gives users the ability to mute noisy tabs with only one click.

With this feature, you don’t have to scroll from page to page, or find the audio or video to stop it. Now, all you have to do is click the speaker icon located in the tab so as to silence the any noisy tab that you cannot find.

mysystemjournal4Now, since the feature is still a work-in-progress, the only way to get it started is by enabling a Chrome flag to get it started.

The first thing that you need to do is enter chrome://flags in the Chrome address bar. Now hit Ctrl+F so as to open the Search function and then type “Enable tab audio muting UI control” in the text entry box that appears in the upper-right corner.

This search will then bring you to the hidden feature where you can click the Enable link and then close the tab. Once this is done, reboot Chrome so as to get the feature working.

Now, click the upward-facing arrow in the system tray and which is located on the far-right hand side of the taskbar. After this, right-click the Chrome icon and then select Exit.

Once Chrome disappear from the system tray, open the browser again and test the feature by opening YouTube on one tab and a news site on another. Once the video starts playing, you can click the “Volume” icon if you want to mute it. To re-enable sound, click the icon again.

How to Enable Distill – Chrome’s Reader Mode

A number of browsers has had this feature for several years now. However, Chrome has finally caught up by adding a “Reader mode” that will break down an article into its text and images so as to make it much easier to read.

The new feature known as Distill which might be a work-in-progress is still worth trying out for those who use Chrome a lot.

However, in order to use Distill, there are a few steps that you will need to carry out. Firstly, you have to pin Distill to your taskbar. Of course, a desktop shortcut should also work.

mysystemjournal3If you haven’t done this yet, right-click on Chrome’s icon and click “Pin this program to the taskbar”. Now close Chrome via the taskbar where you right-click the Chrome icon and then click Exit.

Once this is done, right-click the Chrome icon in the taskbar while highlighting Google Chrome as a result. Now, right-click Google Chrome again and then select Properties.

With this, a Properties window now opens. Under the Shortcut tab, you’ll see a label titled ‘Target’ along with a text-entry box. Now place the cursor after the last quotation mark and type: –enable-dom-distiller.

Click Apply and then OK after that.

After this, open Chrome and select the ‘hamburger’ icon on the upper right side where a new option that says “Distill page” should be displayed.

All you have to do is select “Distill” when you are viewing an article and this will make your reading a whole lot easier.

One thing you must know is that this feature is a simple one and does not have anything fancy.

Alternatively, there are extensions from the Chrome Web Store such as Clearly that offers the same feature as Distill.

2 Ways to Check if a Website is Down

Using the Internet can work out to be a great book but there are times when it isn’t – when you connection is down, of course. While there are easy fixes that one can opt for, there are other times when it isn’t and where access to your favorite sites is completely shut off.

There are only two scenarios that can result from such a situation: either the problem is with the site or your internet connection.

So, in order to figure out whether the problem is with you or the site, here’s what you can do:

#1: Use isup.me

One of the simplest things that you can do is visit a site: http//isup.me to check whether a site is truly down or is it because of your internet connection. Enter the address of the site you want to check and hit the Enter key. In a few seconds, you’ll find out whether the site is down and the problem is happening only with ‘just you’ or it’s ‘not just you’.

#2: Use the command line program Ping

Another way to check this is by using the command line program Ping. All you have to do is open the command line and type “ping www.facebook.com” if you are checking for whether Facebook is up or not. Enter any other site’s address in place of Facebook here to do the same. Enter the “www” and hit the Enter key. If you see four lines with “Reply from…”, then the site is working. If you see the message“Request timed out”, then the site is down. Also, remember that some sites refuse pings with a couple of examples being Amazon and PCWorld.

How to Use Gmail’s Hidden Colored Stars to Organize Your Inbox

While there’s no doubt that a clearly organized Gmail inbox can give one a sense of order, there are other aspects, such as its Starred section, that can improve it further.

Labels can prove to be very efficient when it comes to categorizing and storing certain emails but there are important emails that can be found by Starring them. It’s much easier to access these emails too.

Of course, there’s more to Gmail than just yellow icons that are used to indicate starred emails. Accessing your Gmail settings will show you a number of colored stars such as green, blue, red, orange and purple too. If that’s not enough, you can use colored exclamation points, check marks among other items that are available.

While you can each colored star to indicate an action that you would like to take, there’s no way of personalizing each star with a particular purpose or name.

To set up this feature with Gmail, click the cog in the upper right hand corner and select Settings from the dropdown menu.

When the Settings screen opens, look for the General tab and then the Stars section that close to the top. Google’s presets that are in place include 4 stars or all stars and that should include more starred colors to you.

Also, you can drag and drop each star from the In Use to the Not In Use category when necessary. This will help you get the number of stars that you need. Of course, dragging and dropping stars from within the In Use section can be done to get the exact lineup that is necessary.

Make sure you hit Save Changes at the bottom and get back to your inbox to start using these stars.

That said, if you want to use a yellow star, then click once or just once more to get a list of colors that you can pick from. That’s it.